💌 Just a quick note before we get started: this post contains affiliate links. That simply means I might earn a small commission (at no extra cost to you) if you decide to book or buy through one of the links. It helps me keep Postcards from Kirsty running — and hopefully helps you plan your own adventure too!
How to Travel with Only a Carry-On might sound impossible, especially for trips longer than a week — but it’s actually doable. It’s an ideal solution if you’re tired of hauling heavy luggage around, though it does take some planning (and tips from someone who’s done it) to make the carry-on-only approach work.
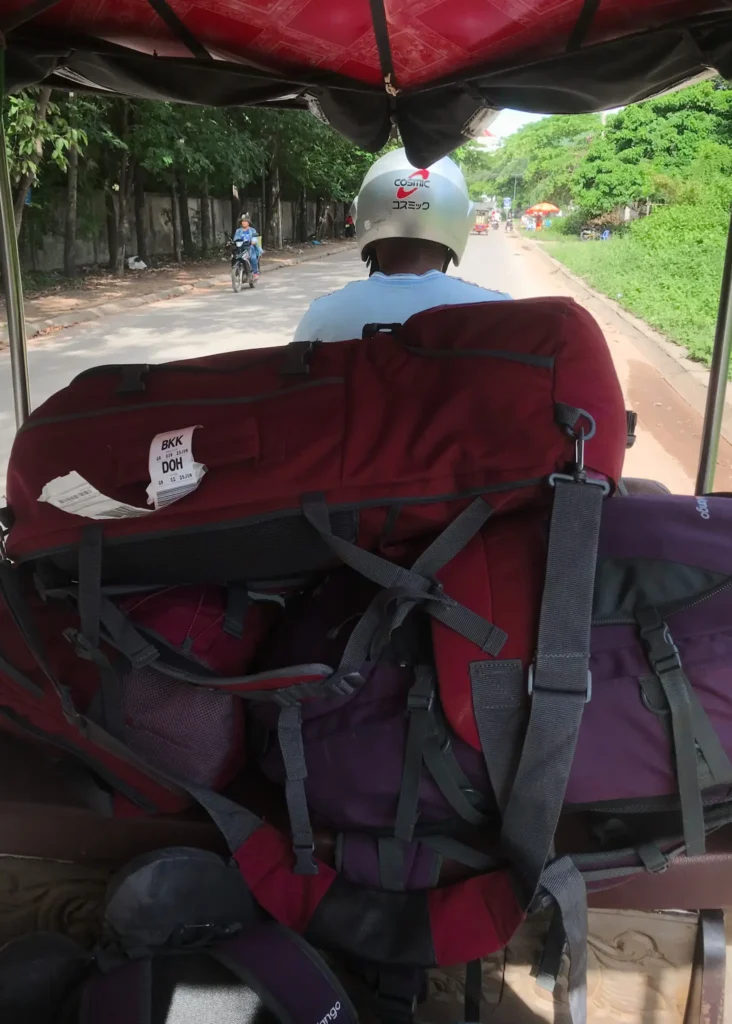
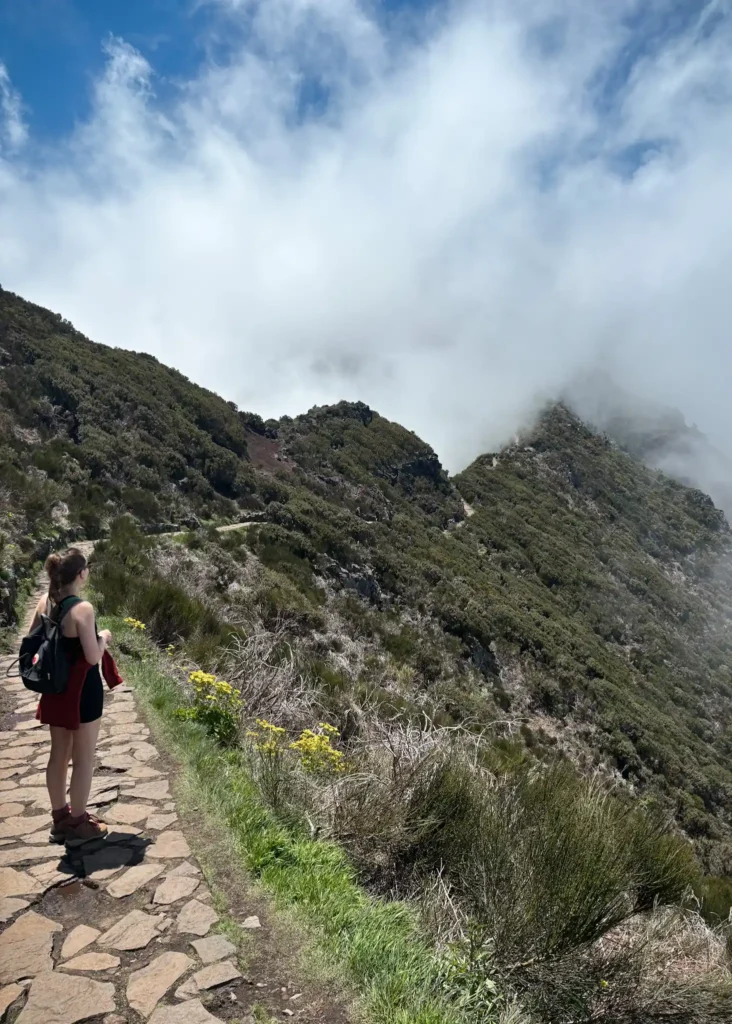
From hauling a suitcase across Africa to carrying a massive backpack in Thailand’s 40-degree heat, I’ve never quite mastered the perfect luggage setup. That’s why switching to just a carry-on bag felt like the perfect solution.
People on social media make minimalist travel look sooo effortless… but after trying it myself, I can promise you, it’s not as easy as it looks.
Based on my experience, I’ve put together 13 essential tips, plus my recommended carry-on bags and a free packing list. No curated social media sunshine here — just real, practical advice to help you travel light, stay organised, and actually enjoy your adventure.
Why Travel with Only a Carry-On?
Travelling with only a carry-on is the ultimate game-changer — it’s lighter, faster, and far less stressful. You can skip the long airport queues, avoid baggage claim chaos, and don’t need to worry about losing your luggage.
It also forces you to pack smarter, taking only what you truly need. This makes moving between destinations easier and saves you from spending a fortune on a whole new wardrobe before your trip.
Plus, travelling light gives you flexibility — you can hop on budget airlines, take last-minute trips, and actually enjoy your time in the airport without the hassle of checking bags. Whether you’re on a short weekend getaway or a month-long adventure, mastering carry-on travel saves you time, money, and plenty of travel headaches.
Choosing the Right Carry-On Bag Size
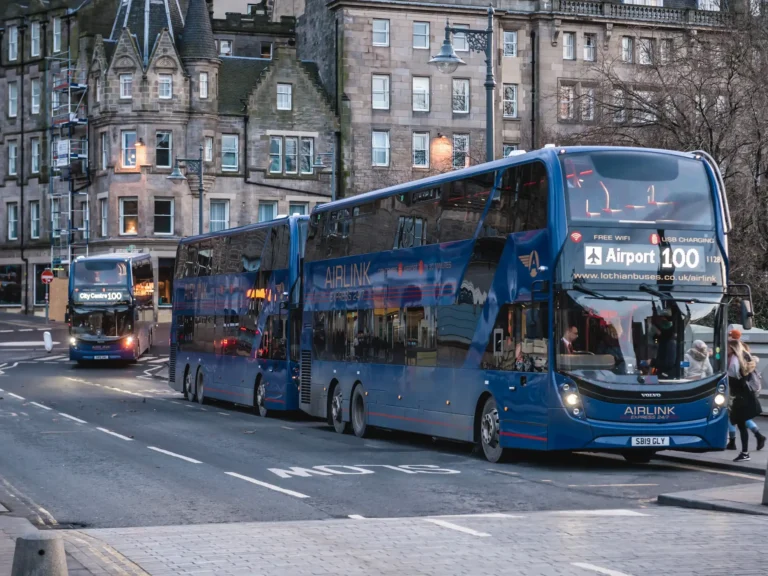
Carry-on bag allowances technically depend on the airline. Budget airlines tend to be stricter: usually, your ticket includes a personal item, and any larger cabin bag comes at an extra cost. Sometimes it’s worth paying a bit more for a higher-tier airline, as they often allow a bigger carry-on size.
Let’s break it down, because it can get quite confusing – especially with all the different terms airlines use for carry-on bags.
Personal Item vs. Cabin Bag vs. Checked Baggage: What’s the Difference?
- Personal Item: This is a small bag that must be able to fit under the seat in front of you. It can be a handbag, laptop bag, backpack, or any bag that meets the size regulations.
- Cabin Bag: This is a larger piece of luggage, such as a backpack, rucksack, or suitcase, that can be stored in the overhead locker. Usually not included in a standard ticket price, especially with budget airlines (Jet2 being the exception to this rule).
- Checked Baggage: Refers to larger suitcases or bags, usually with a higher weight limit, that you drop off at the check-in desk before security. They are stored in the plane’s cargo hold. Checked baggage is not included in the ticket price for budget airlines and costs an additional fee.
Carry-On Bag Size for Budget UK and European Airlines
Baggage size and weight restrictions vary from airline to airline, and they may change without notice. Always check directly with your airline for the most accurate and up-to-date information regarding their baggage requirements. Otherwise, you could be hit with a hefty fee at the airport.
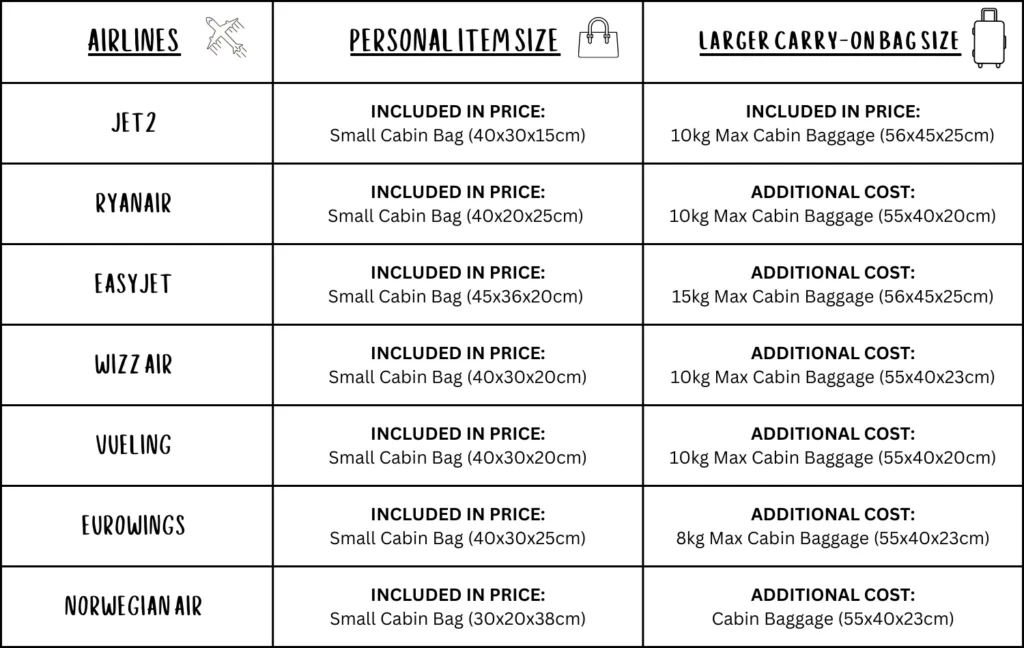
Top Tip: If you have a connecting flight, especially with a different airline, double-check their size restrictions as well. You want to ensure your bag adheres to all airline size restrictions, not just those for your first flight.
Best Carry-On Bags for Every Type of Traveller

The best carry-on bag is lightweight, durable, and features sturdy zippers. Here are some of the best options depending on what type of bag you prefer:
- Want to stick to just a personal item? The Lossga Cabin Bag, sized at 40x20x25 cm, perfectly meets the personal item requirements for Ryanair and Eurowings. Whereas if you’re flying with easyJet, this other Lossga Travel Backpack is the ideal choice.
- Prefer a suitcase? This Antler Cabin Suitcase meets the larger cabin bag regulations for all the budget airlines mentioned above. While it may be a bit expensive, it’s an investment that will last you for years! A major advantage of this suitcase is that it fully opens, making it easy to find your belongings – a total game changer!
- Prefer a backpack? This Johnny Urban Roll Top Backpack is the exact one I used for my trip to Morocco. The roll-top design allows it to expand, making it easy to fit anything you pick up along your journey. Plus, it’s made from recycled plastic bottles. If you’re passionate about sustainability, check out my list of the best eco-friendly travel products!
13 Essential Tips for Travelling Light
Upgrade to a Larger Cabin Bag for More Space
If you’re going for a city break or a one-week trip, you could probably get away with just taking a bag that fits the personal item size. This is included in your ticket, so it would save you from having to pay extra to upgrade to include the larger cabin bag.
However, if you’re going away for longer than a week, the personal item bag size is NOT big enough (talking purely from experience!). I did a three-week trip with a small bag that was the same size as the allowed personal item, and oh boy, it was such a struggle!
If you plan to travel with one bag for an extended period of time, save yourself the hassle and upgrade to the larger cabin bag. I understand it may be an extra expense, but it’s so worth it!
How to Choose the Perfect Carry-On Bag
You’ll see this one is a common theme throughout this blog! But trust me when I say – choosing the right carry-on bag is crucial. It can either make or break your trip.
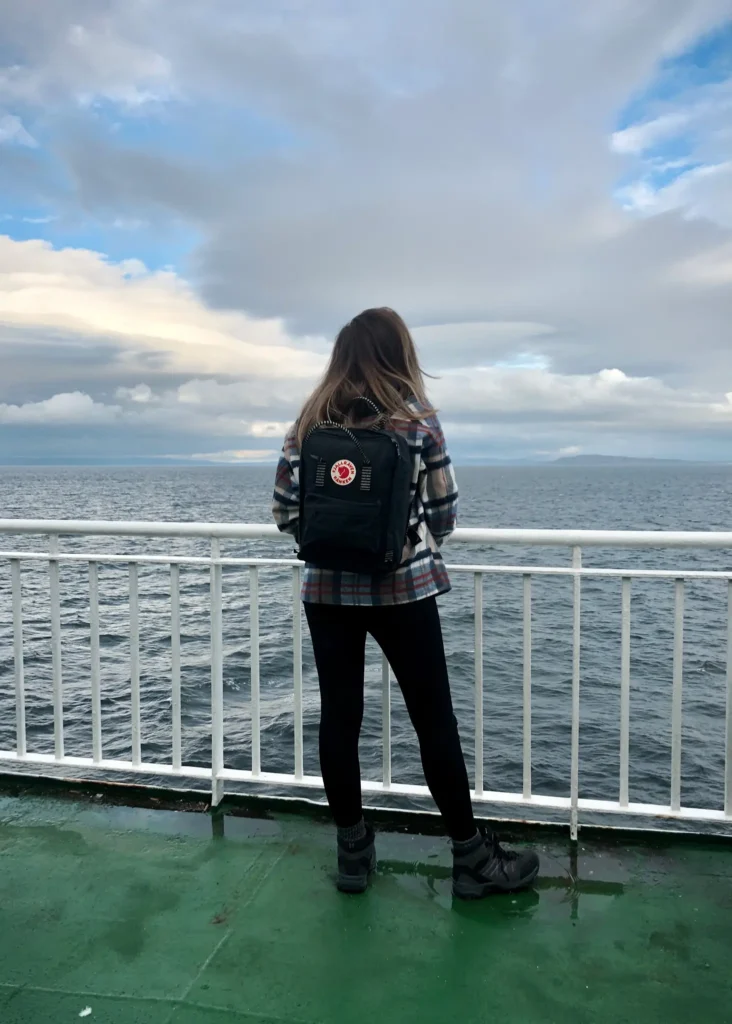
For my first carry-on only trip, I took a Fjällräven Kånken Classic Backpack, and honestly, I wouldn’t recommend it for travelling. It’s small and rigid, making it tricky to access anything at the bottom when it’s fully packed. The pockets also aren’t the most spacious, and they’re quite difficult to get into.
Personally, I’d always go for a backpack over a suitcase as it’s easy just to grab and go, especially in places with difficult terrain. However, this does come down to personal preference. Whatever you choose, I’d recommend picking a relatively light bag, as most airlines have strict carry-on weight limits, which you don’t want to use up on the bag alone.
Another key tip – get a backpack or suitcase that fully opens, and I mean all the way around. This makes it so much easier to grab things from the bottom without having to unpack everything.
You’ll also need to decide between a soft or hard bag. A soft bag lets you squeeze in extra items, but be mindful that it could expand beyond airline size limits. A hard bag, on the other hand, keeps its shape, ensuring you stick to the size restrictions and offers a bit more durability.
Maximise Space with Packing Cubes
I swear by packing cubes – they’re an absolute game-changer for travelling. They help you organise everything into separate compartments, like underwear, makeup, toiletries, and clothes.
One of my biggest pet peeves about travelling is having to empty my bag just to find something, only to repack it all over again. This is where packing cubes come in – they’ve made a huge difference to my travel packing, helping me find exactly what I need without having to empty my whole bag.
The only downside is that they do take up a fair bit of space, and as we already know, space is pretty limited in a carry-on. So, you might not have room for them this time – but if not, definitely get some for when you’re travelling with a bigger bag in the future!
Keep Electronics to a Minimum for Easier Packing
Don’t make the same mistake I did by packing loads of electronics! For my three-week trip, I took my laptop, Kindle, and GoPro (plus all its accessories). Both my laptop and GoPro took up so much valuable space in my carry-on, and I didn’t even use them. To make matters worse, I forgot the waterproof case, which was the only real reason for bringing my GoPro.
If I had to pick one electronic device to take (aside from my phone), it would be my Kindle. It’s one of my favourite essentials, especially for long-haul flights and journeys. It also makes total sense to pack that rather than multiple books.
My advice: Really consider whether you’ll actually use something before packing it. If you have any doubts, leave them behind! Space is precious, and there’s no point in lugging around things you won’t use. And if you do take electronics, ditch the bulky cases where possible – they take up way too much room.
Roll Your Clothes Instead of Folding to Save Room
Ooooh, it’s a bit of a controversial one! There’s often a debate among travellers about whether you should roll or fold your clothes to save room. Both methods have their pros and cons.
However, in my opinion, rolling clothes helps to save space, keeps items less wrinkly, and allows you to squeeze more into your bag! Thin, airy items are perfect for rolling. So if you can fill your carry-on with these types of clothes, you’ll be able to fit loads in!
That being said, I wouldn’t roll everything – some items, like jeans, denim shorts, and thick jumpers, tend to get bulkier when rolled. Therefore, it might be best to use a mixture of these techniques – find what works best for you!
Pack Only the Essentials: Think About Your Destination
With just a carry-on bag, space is limited – you won’t have the luxury of packing a month’s worth of outfits or multiple pairs of shoes, and you won’t be able to prepare for every possible weather condition. So, when packing, keep your destination in mind. If you’re heading somewhere hot, you won’t need loads of cold-weather gear, and vice versa.
Start with the essentials (plenty of underwear!), then aim to pack light, airy clothes that don’t take up too much space. You’re essentially creating a capsule wardrobe: carefully selected clothing items that can be mixed and matched to create a variety of outfits, minimising clutter.
Wear Bulky and Heavy Items on the Plane
If you’re taking any bulky or heavy items, like jackets or jumpers, wear them on the plane. These items take up so much space in your carry-on that you’ll barely have room for anything else.
I wore multiple layers on the plane, including a jacket, jumper, T-shirt, leggings, and my only pair of shoes for the whole trip – this helped save a ton of room. Plus, planes tend to get pretty chilly, so layering up is a win-win!
Bring a Foldable Bag for Daily Essentials
Having everything crammed into one bag can get pretty annoying from time to time. Trying to find your money, passport, and travel documents can turn into a full-on mission. And why is it that when you need something, it’s always in the most inconvenient place?
This happened to me so many times when I travelled with just a carry-on. Every time I had to dig out my passport, liquids, or boarding pass, they were always buried at the bottom of my bag. I’d have to empty everything at security, then scramble to shove it all back in five minutes later. So stressful!
My advice: If you’ve checked in online, you can carry an extra bag with all of your necessities (passport, boarding pass, etc.) through the airport. Before boarding, just empty it and pop it inside your carry-on to avoid any extra baggage fees. Trust me, having everything easily accessible (especially for going through security) will make your life so much easier!
Also, if you take a tote bag or a money belt, it means you’ll have something to carry around your everyday essentials at your destination.
Buy Extra Items at Your Destination to Save Space
Remember, if there’s something you can’t fit in your bag, you can always buy it in the country you’re travelling to. This might be easier and cheaper in some places than others. For example, Southeast Asia – particularly Thailand and Vietnam – is great for picking up extra pieces of clothing.
I actually love buying clothes from other countries – I usually keep them for years and can always look back and remember exactly where I got them from.
That being said, I wouldn’t really recommend buying things like sunscreen or aftersun in Thailand or Vietnam, as they can be really expensive. So, plan for your destination and do a bit of research to see what’s easy to find.
If you can hold off for a couple of days after arriving, you can also pick up any extra essentials you might need.
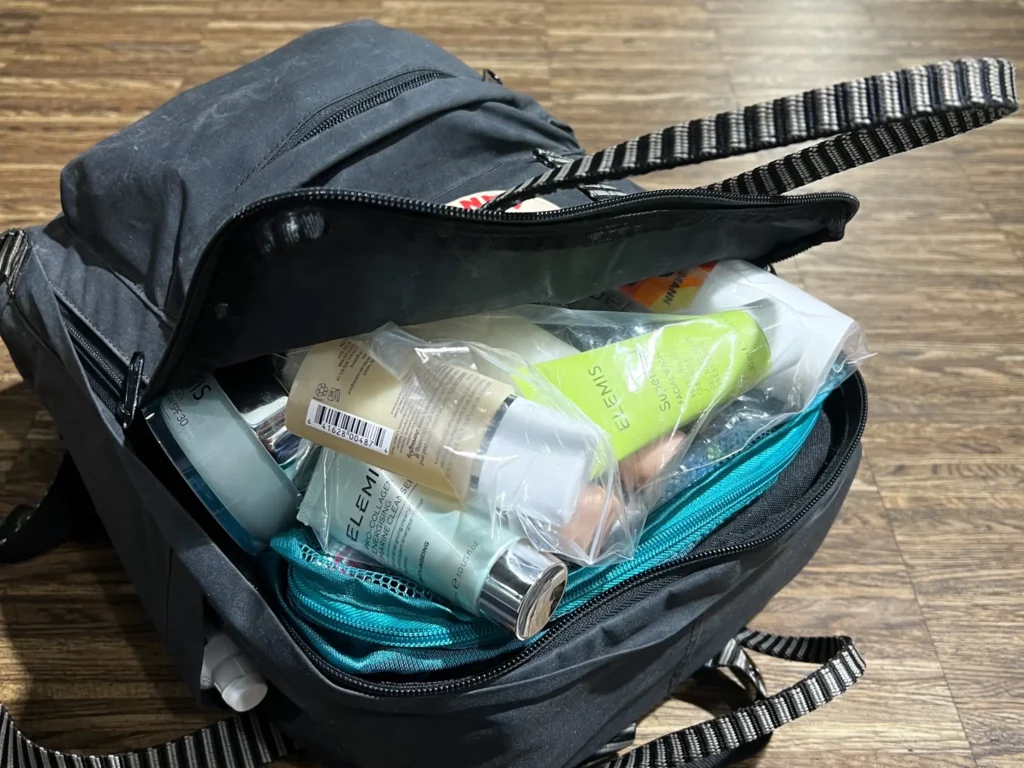
Sort Your Liquids into Clear Plastic Bags for Airport Security
Sort your liquids into a single plastic bag (usually 20cm x 20cm for security) and place it at the top of your bag before you even get to the airport. I made the mistake of taking far too many liquids with me, and when I sorted them at the airport, they ended up filling three bags! Unfortunately, I had to toss two of my liquid bags in the bin.
Use Small Reusable Bottles for Your Toiletries

Grab a set of 100ml reusable travel bottles and transfer your liquids (shampoos, conditioners, body wash, etc.) into them. This way, you can buy full-sized bottles, transfer what you need into reusable travel bottles, and keep the rest at home for when you return.
If you’re staying in hotels (or selected hostels), they often provide free shampoo, conditioner, and body wash. This means you can top up your travel bottles with whatever’s available at your accommodation, saving you money on extra toiletries.
Book Accommodation with Laundry Facilities to Help You Travel Light
If you’re embarking on a long trip with just a carry-on bag, it’s highly likely that at some point you’ll need to wash your clothes.
Make sure to book accommodation that offers a washing or laundry service, or is close to a place where you can get your laundry done. This way, getting your washing done won’t cause too much inconvenience on your trip.
Top Tip: Having a small bag means your dirty clothes and clean clothes will be in close proximity to each other. Bring a spare bag (it doesn’t need to be fancy, a carrier bag will do) to store your dirty clothes.
Don’t Let Your Bag Limit Your Adventure
If you haven’t packed enough toiletries or clothes, who cares? Just have the time of your life, go on those adventures, and enjoy yourself. At the end of the day, it’s just a bag – try not to let it stress you out! You won’t even remember in a year the things you didn’t have space for, but you will remember all those incredible memories you made!
Packing Smart: What to Include in Your Carry-On
When you’re travelling with only a carry-on, every inch of space counts — so packing smart is essential.
Start by laying out everything you think you need, then try and fit it into your carry-on bag. If it doesn’t all fit, bring everything back out and reassess what is essential and try again. It’s going to be a process of trial and error.
My suggestion would be to pack items that can be mixed and matched — think neutral colours and lightweight layers. A good rule of thumb is the 5-4-3-2-1 method: five tops, four bottoms, three dresses or outfits, two pairs of shoes, and one jacket.
Pack heavier items at the bottom and use packing cubes to stay organised. Slip small items like socks or cables into shoes, and wear your bulkiest outfit on the plane. Smart packing means less stress — and more freedom to enjoy the journey.
Clothing and Accessories for a Carry-On Trip

When travelling with only a carry-on, the goal is to choose clothing and accessories that work for multiple occasions. Every piece you bring should earn its place in your bag!
Start with a capsule wardrobe of versatile items that can be mixed and matched. Stick to neutral tones (like black, white, beige, or navy) and fabrics that are lightweight, breathable, and wrinkle-resistant.
Here’s a quick checklist for clothing and accessories:
- Tops: 3–5 neutral and interchangeable tops.
- Bottoms: 2–3 pairs — think jeans, lightweight trousers, or shorts.
- Optional: 1 dress or outfit that can be dressed up or down.
- Outerwear: A compact jacket or cardigan suitable for layering.
- Shoes: One pair of comfy walking shoes and one versatile pair for evenings.
- Accessories: A hat and a few small jewellery pieces.
Tech and Travel Essentials for Your Carry-On
When travelling with only a carry-on, less is more – choose tech and travel essentials that are compact and don’t take up too much space. Here are some must-haves to include in your carry-on:
- Portable Charger/Power Bank – A lifesaver for long travel days when outlets are scarce.
- Universal Travel Adapter – Essential for international trips, so you can charge all your devices anywhere.
- Noise-Cancelling Headphones or Earbuds – Block out plane (or hostel) noise and enjoy your music, podcasts, or movies in peace.
- Phone and Charging Cables – Tuck these into the pockets of your carry-on for quick access on the go.
- Kindle or Tablet – Ideal for saving space while still bringing your favourite books or entertainment.
- Travel Documents and Digital Copies – Keep passports, boarding passes, and backups of important info easily accessible.
- Reusable Water Bottle – Stay hydrated (just empty it before security!).
- Travel Pillow, Eye Mask and Earplugs – Essentials for catching sleep on long flights or bus/train rides.
My Honest Opinion: Does Travelling with Just a Carry-On Make Life Easier?
Almost three years ago, I decided to give travelling with only a carry-on bag a go for my first solo trip – mainly because the fees to add a bigger bag on a budget airline were ridiculous!
Cue me embarking on a three-week adventure around Jordan and Croatia with just a tiny personal item-sized bag. And, like most things in life, I quickly realised that travelling with only a carry-on isn’t effortless – it definitely has its pros and cons.
If you’d asked me right after that trip, I would’ve said that travelling carry-on only does not make life easier. But my opinion has changed. On a later trip around Morocco with a slightly larger carry-on, I found it worked so much better!
What I’ve learned is that the bag you choose matters… a LOT. The first time, I was limited to a small personal item (40x20x25cm). The second time, I upgraded to a larger cabin bag (55x40x20cm), and it made all the difference – a must for any carry-on-only trip.
Trip length also matters. For a city break or short trip, a personal item may be fine. But for anything over a week, I’d strongly recommend the larger carry-on.
Pros and Cons of Travelling with Only a Carry-On Bag
- Pros: Save Money and Time – If you are flying with a budget airline, sticking to a carry-on can save you a fortune on checked baggage fees. Plus, you’ll skip the long waits at check-in.
- Pros: Lightweight – A carry-on is much lighter than a bulky backpack or suitcase, making it easier to move between destinations.
- Pros: Convenient – With just a carry-on, packing up and heading out is much easier. No worrying about lost luggage or waiting forever at baggage claim.
- Cons: Hassle – Everything fits into one bag, which means passports, tickets, money, and other essentials are all jumbled together. Getting things in and out without everything spilling can be tricky, especially at the airport.
- Cons: Limited Clothing Options – With a small bag, your wardrobe is limited. On my three-week trip, I packed one pair of shoes, a few tops, a couple of bottoms, and one dress – definitely not enough! I needed to wash clothes within the first couple of days.
- Cons: Unplanned Purchases – Running out of clean clothes meant I had to buy more, which added extra baggage since my carry-on couldn’t fit it all.
FREE Carry-On Packing List
Just taking a carry-on bag involves a lot of planning. You really need to decide what you have space to take and what you don’t.
If you want to make packing for a carry-on-only trip a wee bit easier? Then, I’ve got you covered! Below, you’ll find two totally free downloadable PDFs of my Carry-On Only Packing List. One is pre-filled with essentials, and the other is a blank list so you can customise it as you please.
Download it, print it off, and tick things off as you pack – trust me, it’ll help you to feel more organised! Oh, and to make things even easier, I’ve added a little preview so you can see exactly what you’re getting before you hit download. Enjoy!
Loved this guide on how to travel with only a carry-on? Save it to Pinterest for your next trip!
I’d love it if you could drop a comment below, share my Pinterest pins, and subscribe to my blog to stay updated with new posts. Every bit of engagement helps my little travel blog grow!
This post covers everything you need to know about how to travel with only a carry-on.
Thanks so much for reading – it means the world!
Kirsty x